Hi, this is Judith!
Isn't Janine great? I learned so much from her post. She has so much more experience with different mordants than I have. Cris Winters had asked for lots of mordant information and thankfully Janine was able to help with that. Janine also talked about Amelia Poole. We are very lucky to have her in Maine. She often does workshop and Janine has attended two. I see Amelia at least yearly at craft fairs. Her paper and fabric prints are among the best that I have seen. I really love her because gets a really good print rather than fabric with a blurry shape and great coloration. I prefer the print since I am a printer and Janine prefers the fabulous colorations. Isn't it nice to be the same (we both like eco-prints) and different (we call different effects "success")?
Before I start, I apologize for the horrible pictures. I'll try again with natural light and replace these if the pictures are better.
I wanted to tell you about my experiment with iron. I always use iron in my boiling pot and believe it gives a darker print. Above are the iron pieces I generally use. Sorry the picture is horrible. I believe they are old spark plug tools.
Kinda by accident I tried using some iron after the boiling. I tried eco-printing fabric with the results of lovely soft browns and only a few very light prints. Can you even see the prints? Two leaves are there but you have to work to see them.
I decided to do some rusting on top of them. After letting the fabric sit for a couple of weeks and ironing it in an attempt to set the eco-prints I had I sat the fabric in vinegar and weighted it down with washers. Lo and behold after just a few hours here is the result I got--the color of the fabric changed and the print was significantly more distinct. There are so much better in person and in focus.
Speaking of the lovely soft brown I got on the fabrics, they were different than my normal results and I think I know how I got it. I have a long strip of birch bark that I thought might be useful for something. When I was boiling the fabric I added the birch bark. I wondered if since the leaves print well the bark would change the color of the prints. If nothing happened, I thought that at least I would soften the bark and be able to shape it. The results after boiling was the soft browns. I don't know that the birch bark made the difference since I have not repeated the experiment but I thought I would mention it.
I have also tried using other materials to color the prints. Copper is supposed to increase the green/blue of the prints. I have used a copper pipe both in the boiling pot and as a rod to wrap my fabric/leaves bundle around. I personally have not noticed a significant difference in color. I have also added avocado pits and peels to the boiling water. That is supposed to make the prints more yellow-green. Again, I could not really tell a difference. I am not saying it doesn't work--lots of other people have had success with it--but so far I have not. Could be I am looking for huge differences rather than a subtle change. Could also be since I always use iron the color from the iron is more dominant.
Artist: Kit Eastman
This is how Kit describes herself taken from off her blog:
"I use the materials and techniques of a traditional Japanese textile art called katazome (stencil dyeing) to capture my experience of a natural place. My materials - cloth, rice paste resist, soymilk, natural dyes and pigments - engage my senses. The process creates a centering rhythm and a space for reflection."
I love her Katazome prints but she also does some eco-printing. I love it because they are so complex, certainly more than I have ever attempted.
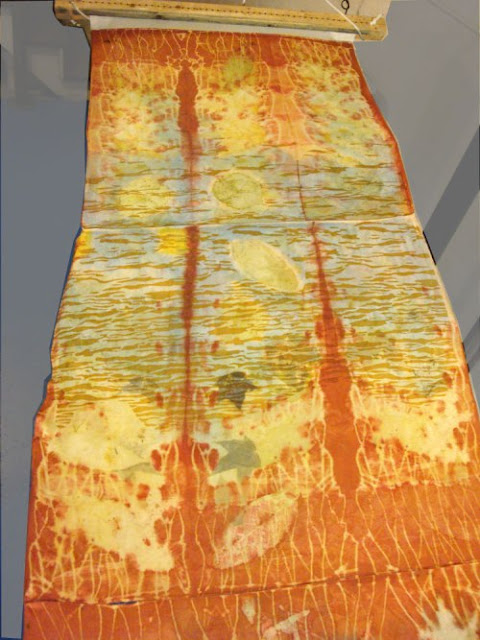
Isn't that even lovelier than you ever imagined? Here is the process she used:
"Started with ecoprint bundles around my favorite fall leaves simmered in madder; then painted some natural pigments on that … followed by a rice paste layer of my water stencil, using some thin tracing paper as a mask. More pigment layers and curing to come".
Here is another of her eco-prints. The process has many steps so I am not going to even attempt to explain it but she does a really thorough description that is worth reading and then trying.
A TECHNIQUE DRIVEN Blog dedicated to mastery of surface design techniques. First we dye, overdye, paint, stitch, resist, tie, fold, silk screen, stamp, thermofax, batik, bejewel, stretch, shrink, sprinkle, Smooch, fuse, slice, dice, AND then we set it on fire using a variety of heat tools.


No comments:
Post a Comment
Although this blog is no longer active, we will get your comments so please feel free to share them.